Getting started
Run the setup wizard, then get your team clocking in.
Getting started
Sign up on the landing page. ClockTap puts you on the free Starter plan: one location and up to five employees, no credit card. The setup wizard opens the first time you sign in.
The wizard has five steps: Mode, Location, Employees, Schedule and Complete. It saves your progress in this browser until you finish, so you can close the page and come back.
Pick how your team clocks in
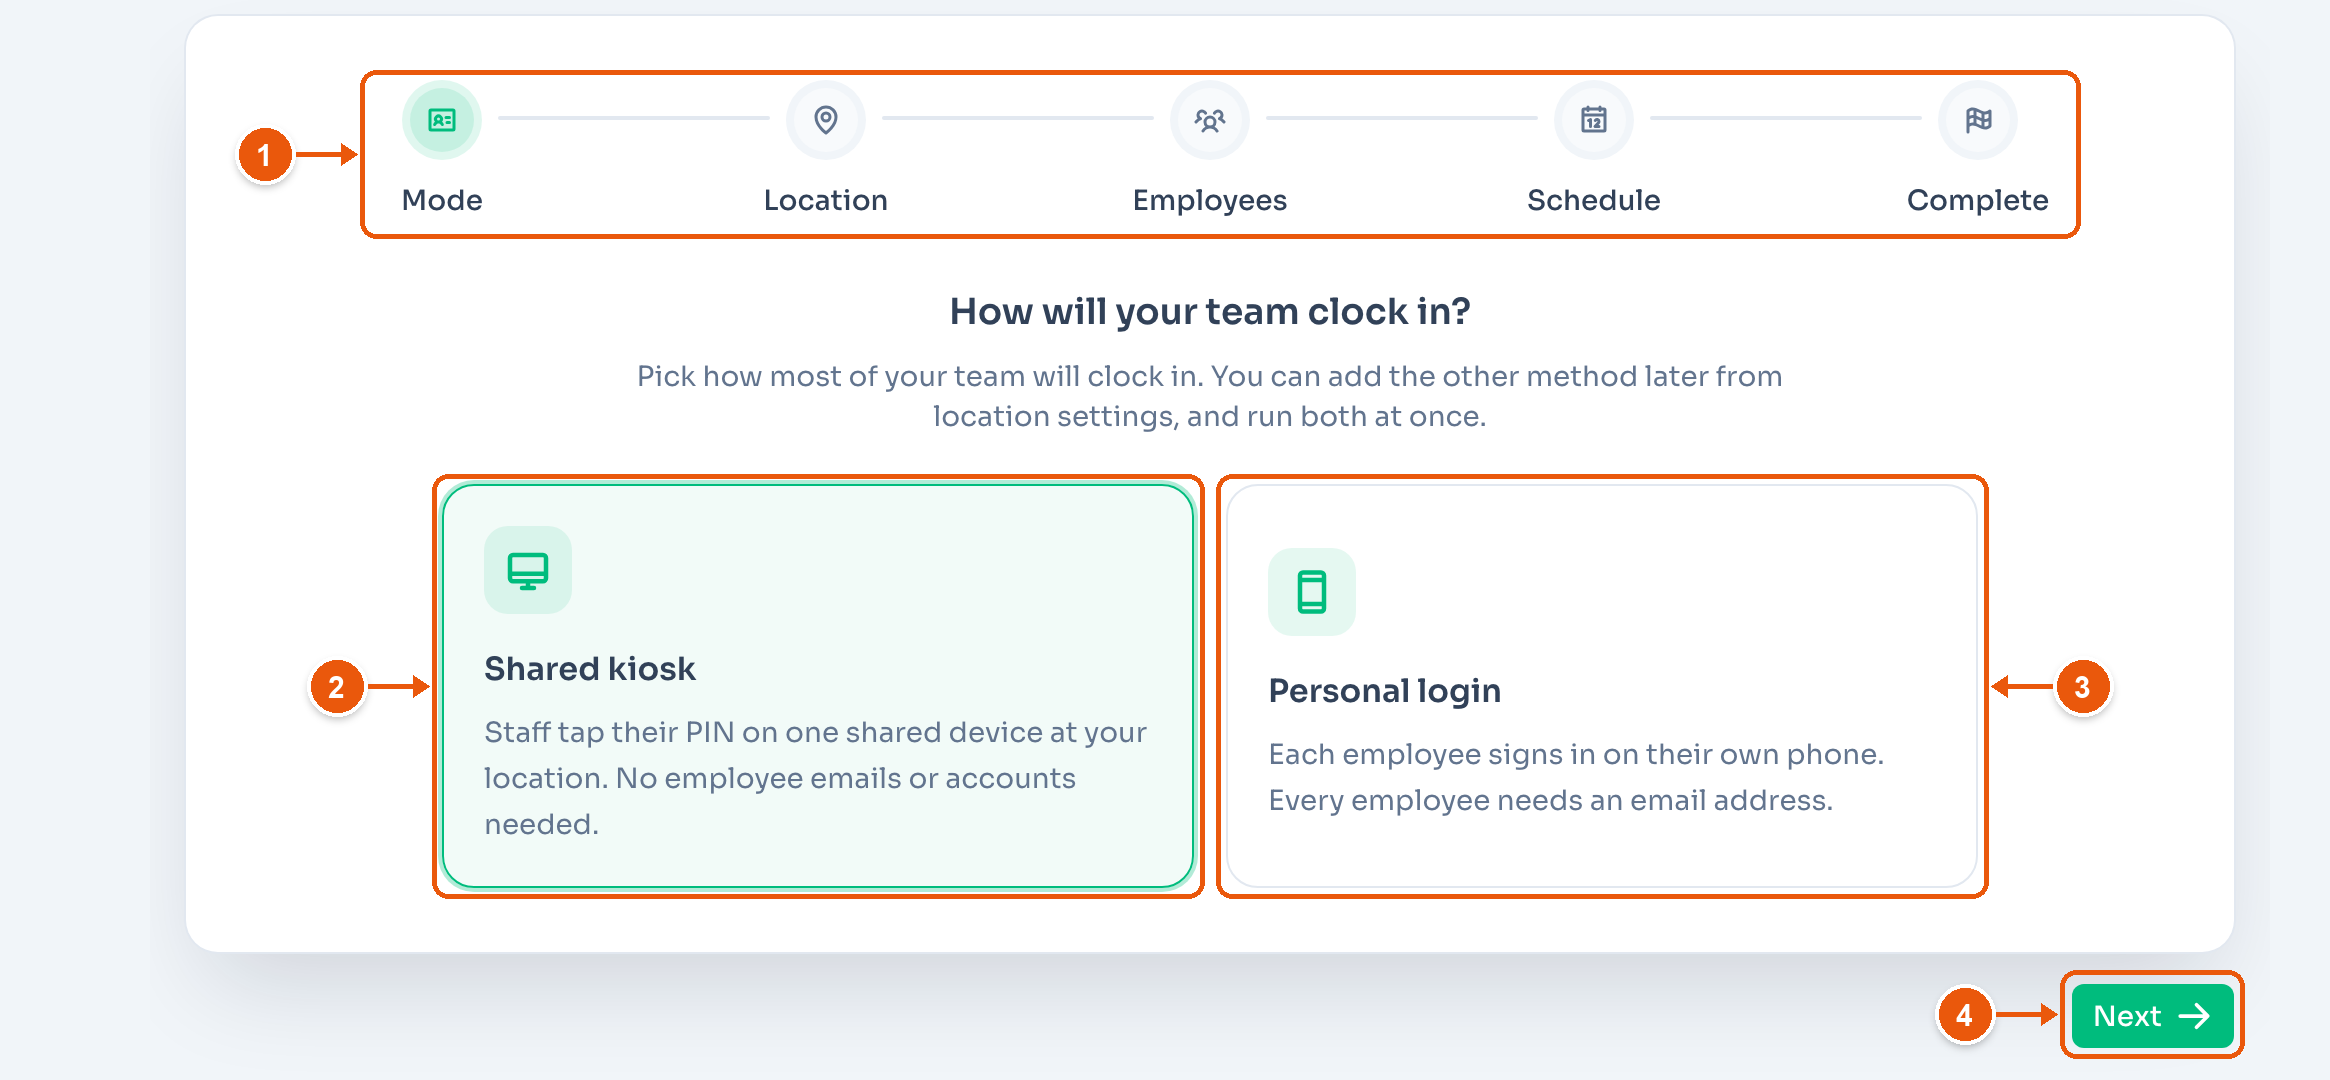
- The five steps. Tap a step you have already done to go back to it.
- Shared device. Staff tap their PIN on one shared device at the location. They need no email.
- Personal login. Each employee signs in on their own phone. Every employee needs an email address.
- Next.
Pick what most of your team will use. You can turn on the other method later in Location Settings, and run both at once.
Name the location
A location is where a group of employees reports for work: a shop, a branch, or a client site.
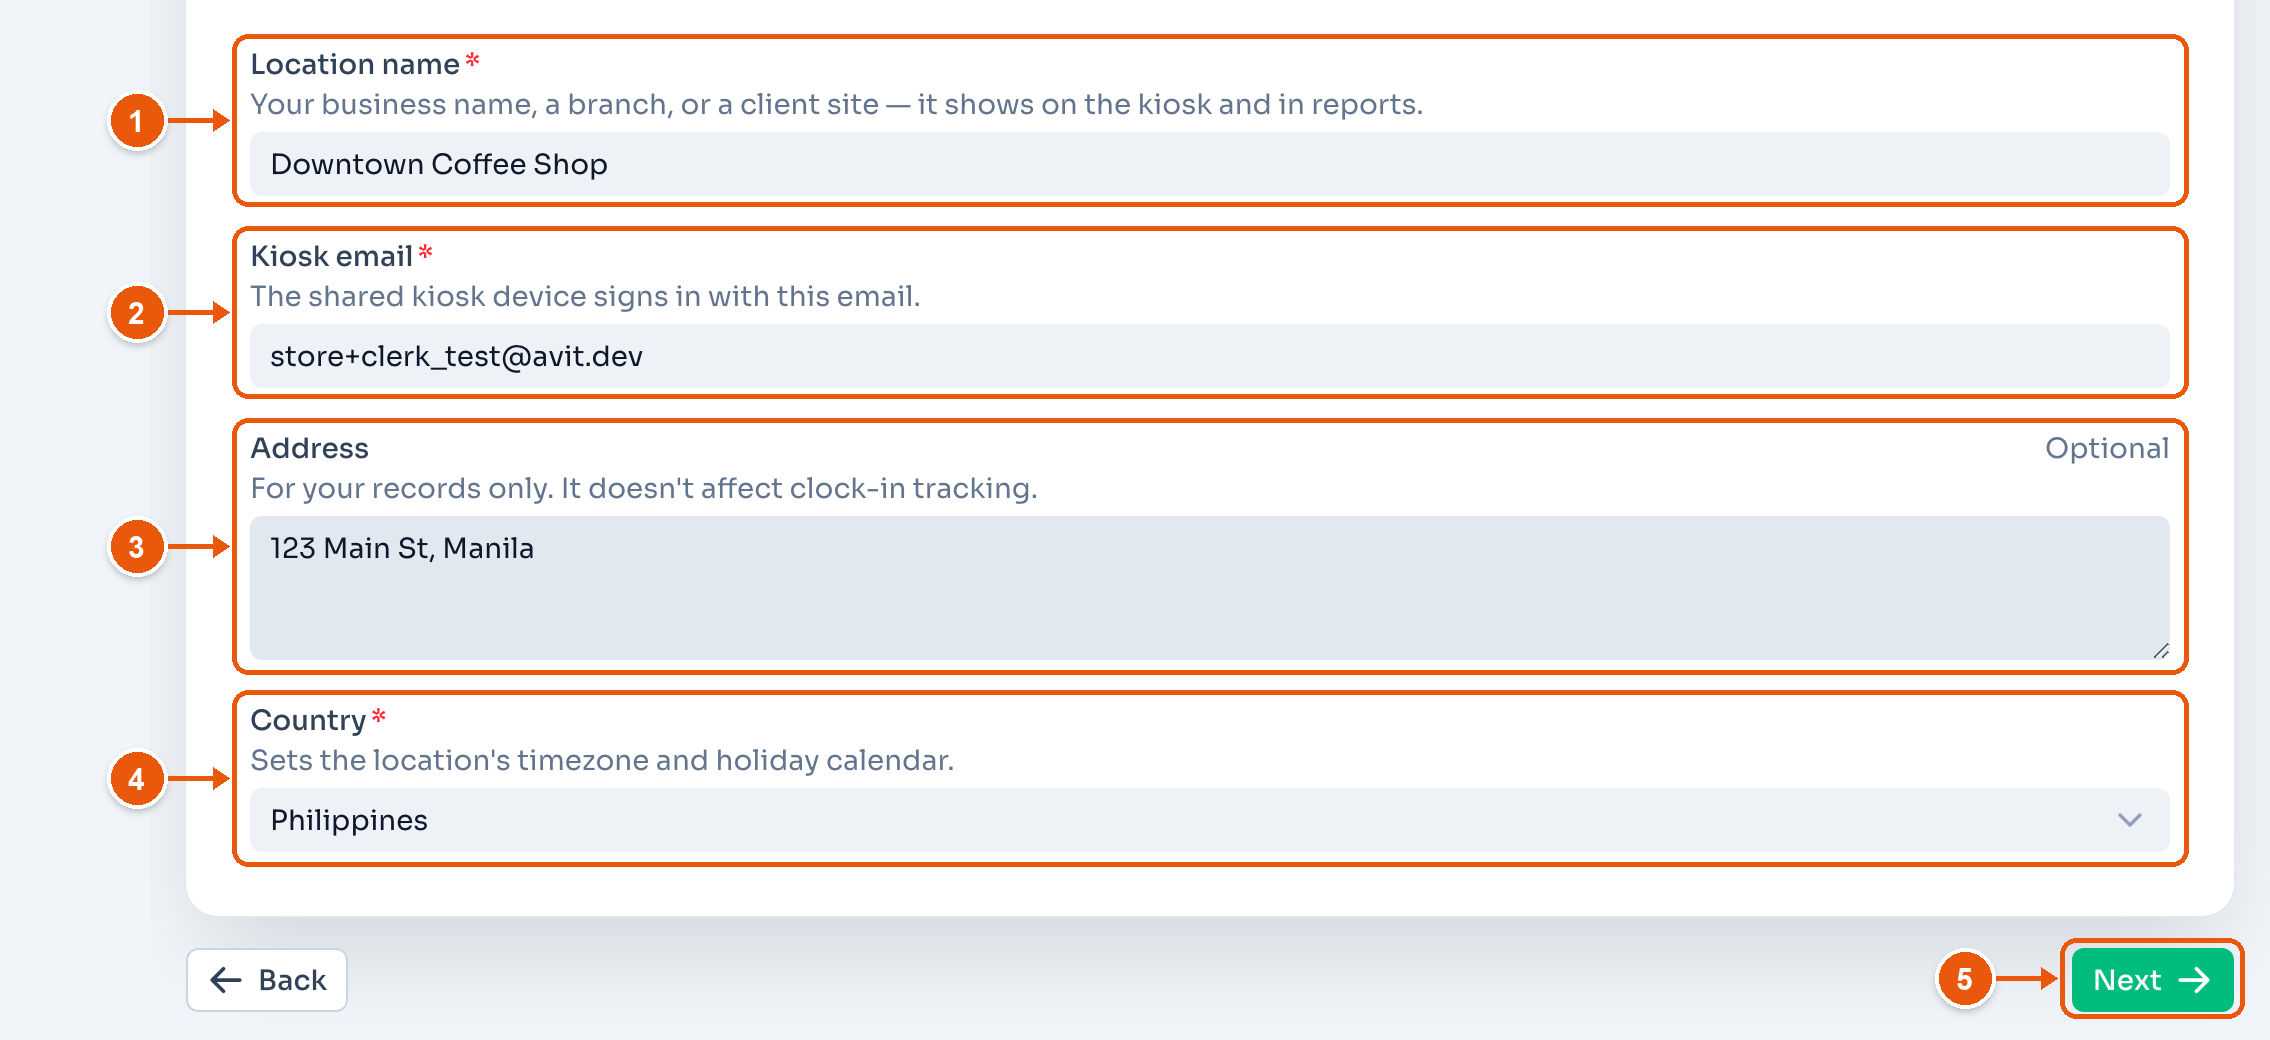
- Location name. It shows on the kiosk and in reports.
- Kiosk email. The shared device signs in with this email. Only a Shared device location asks for it. Use an email for the device, like
kiosk@yourcompany.com, not the one you signed up with. - Address. Optional. It does not change how clock-ins are tracked.
- Country. Sets the location's timezone and holiday calendar. A country with more than one timezone also shows Timezone. Clock-ins, shifts, leave and payroll are recorded in that timezone.
- Next.
Add employees
You can add up to 3 employees here. Add the rest later from Employees.
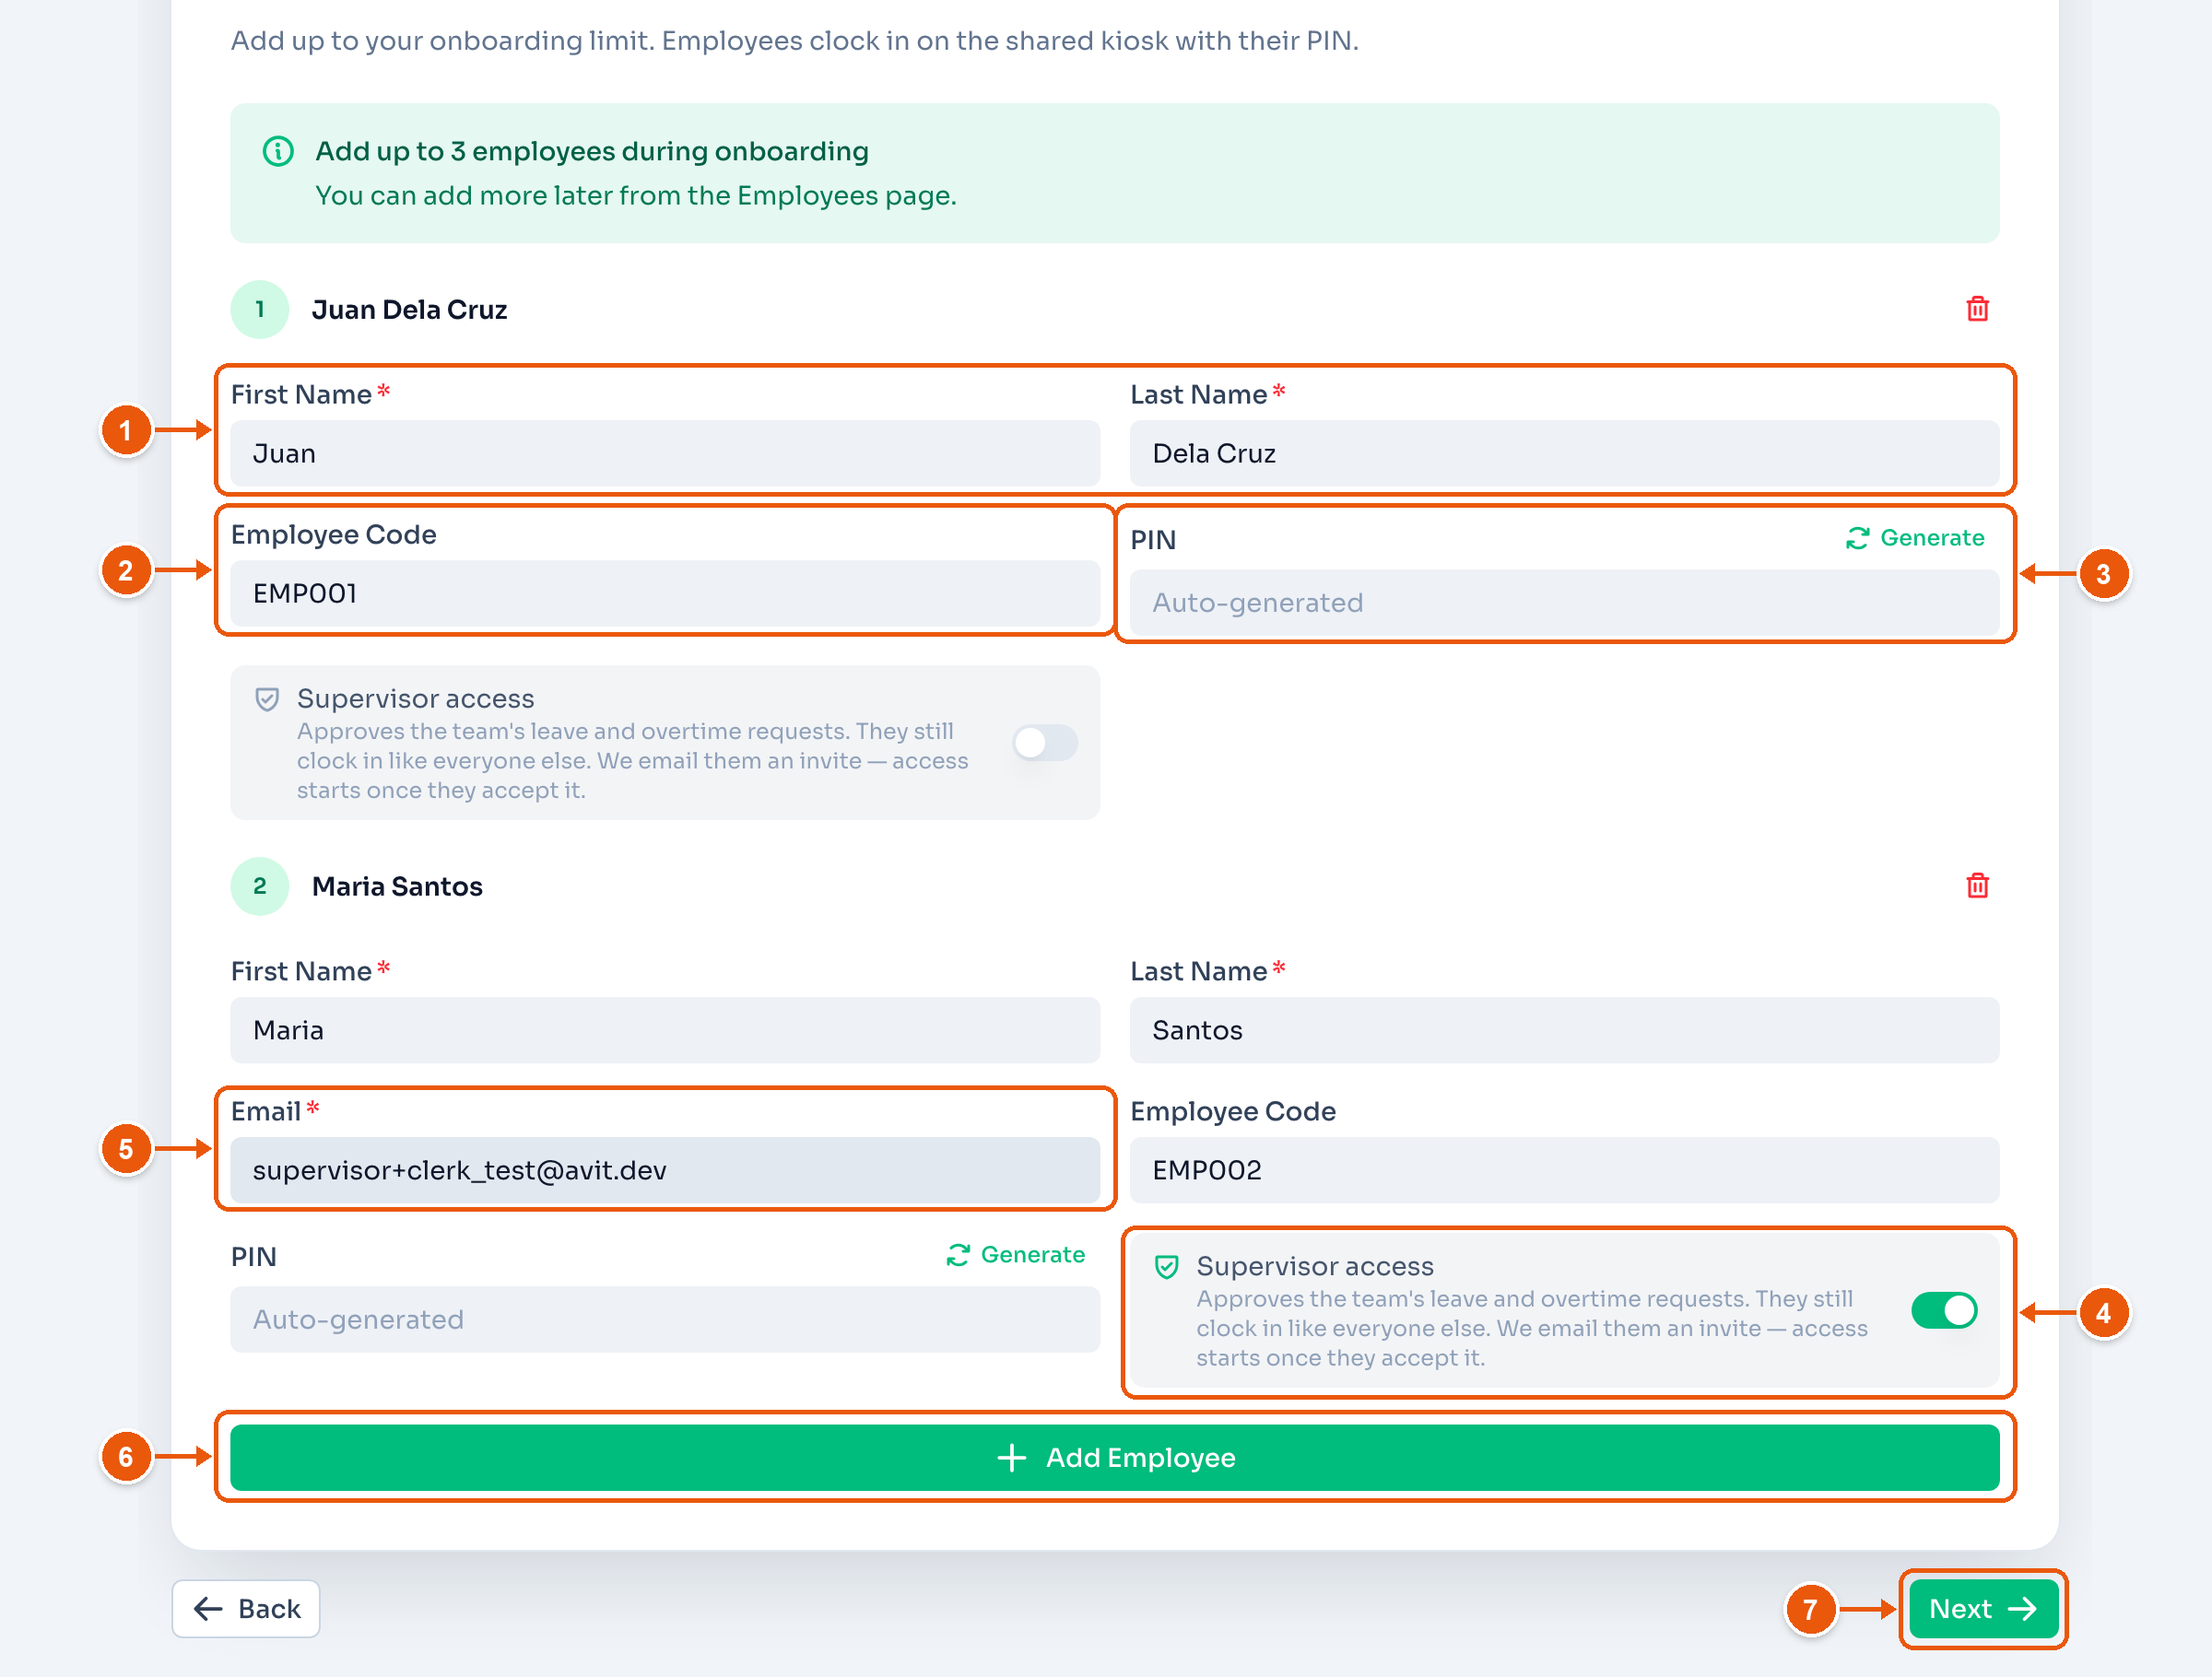
- First Name and Last Name.
- Employee Code. Optional. Here, EMP001.
- PIN. Leave it empty and ClockTap makes a 4-digit PIN when you finish. Generate makes one now. Only a Shared device location asks for PINs.
- Supervisor access. A supervisor approves the team's leave and overtime, and still clocks in like everyone else. Here, Maria Santos.
- Email. A supervisor needs one for their invite. With Personal login, every employee needs one. It cannot be the email you signed in with.
- Add Employee.
- Next.
The bin icon beside a name removes that employee.
Set the weekly schedule
A schedule lets ClockTap tell who is late and who worked overtime. Every day starts as a rest day.
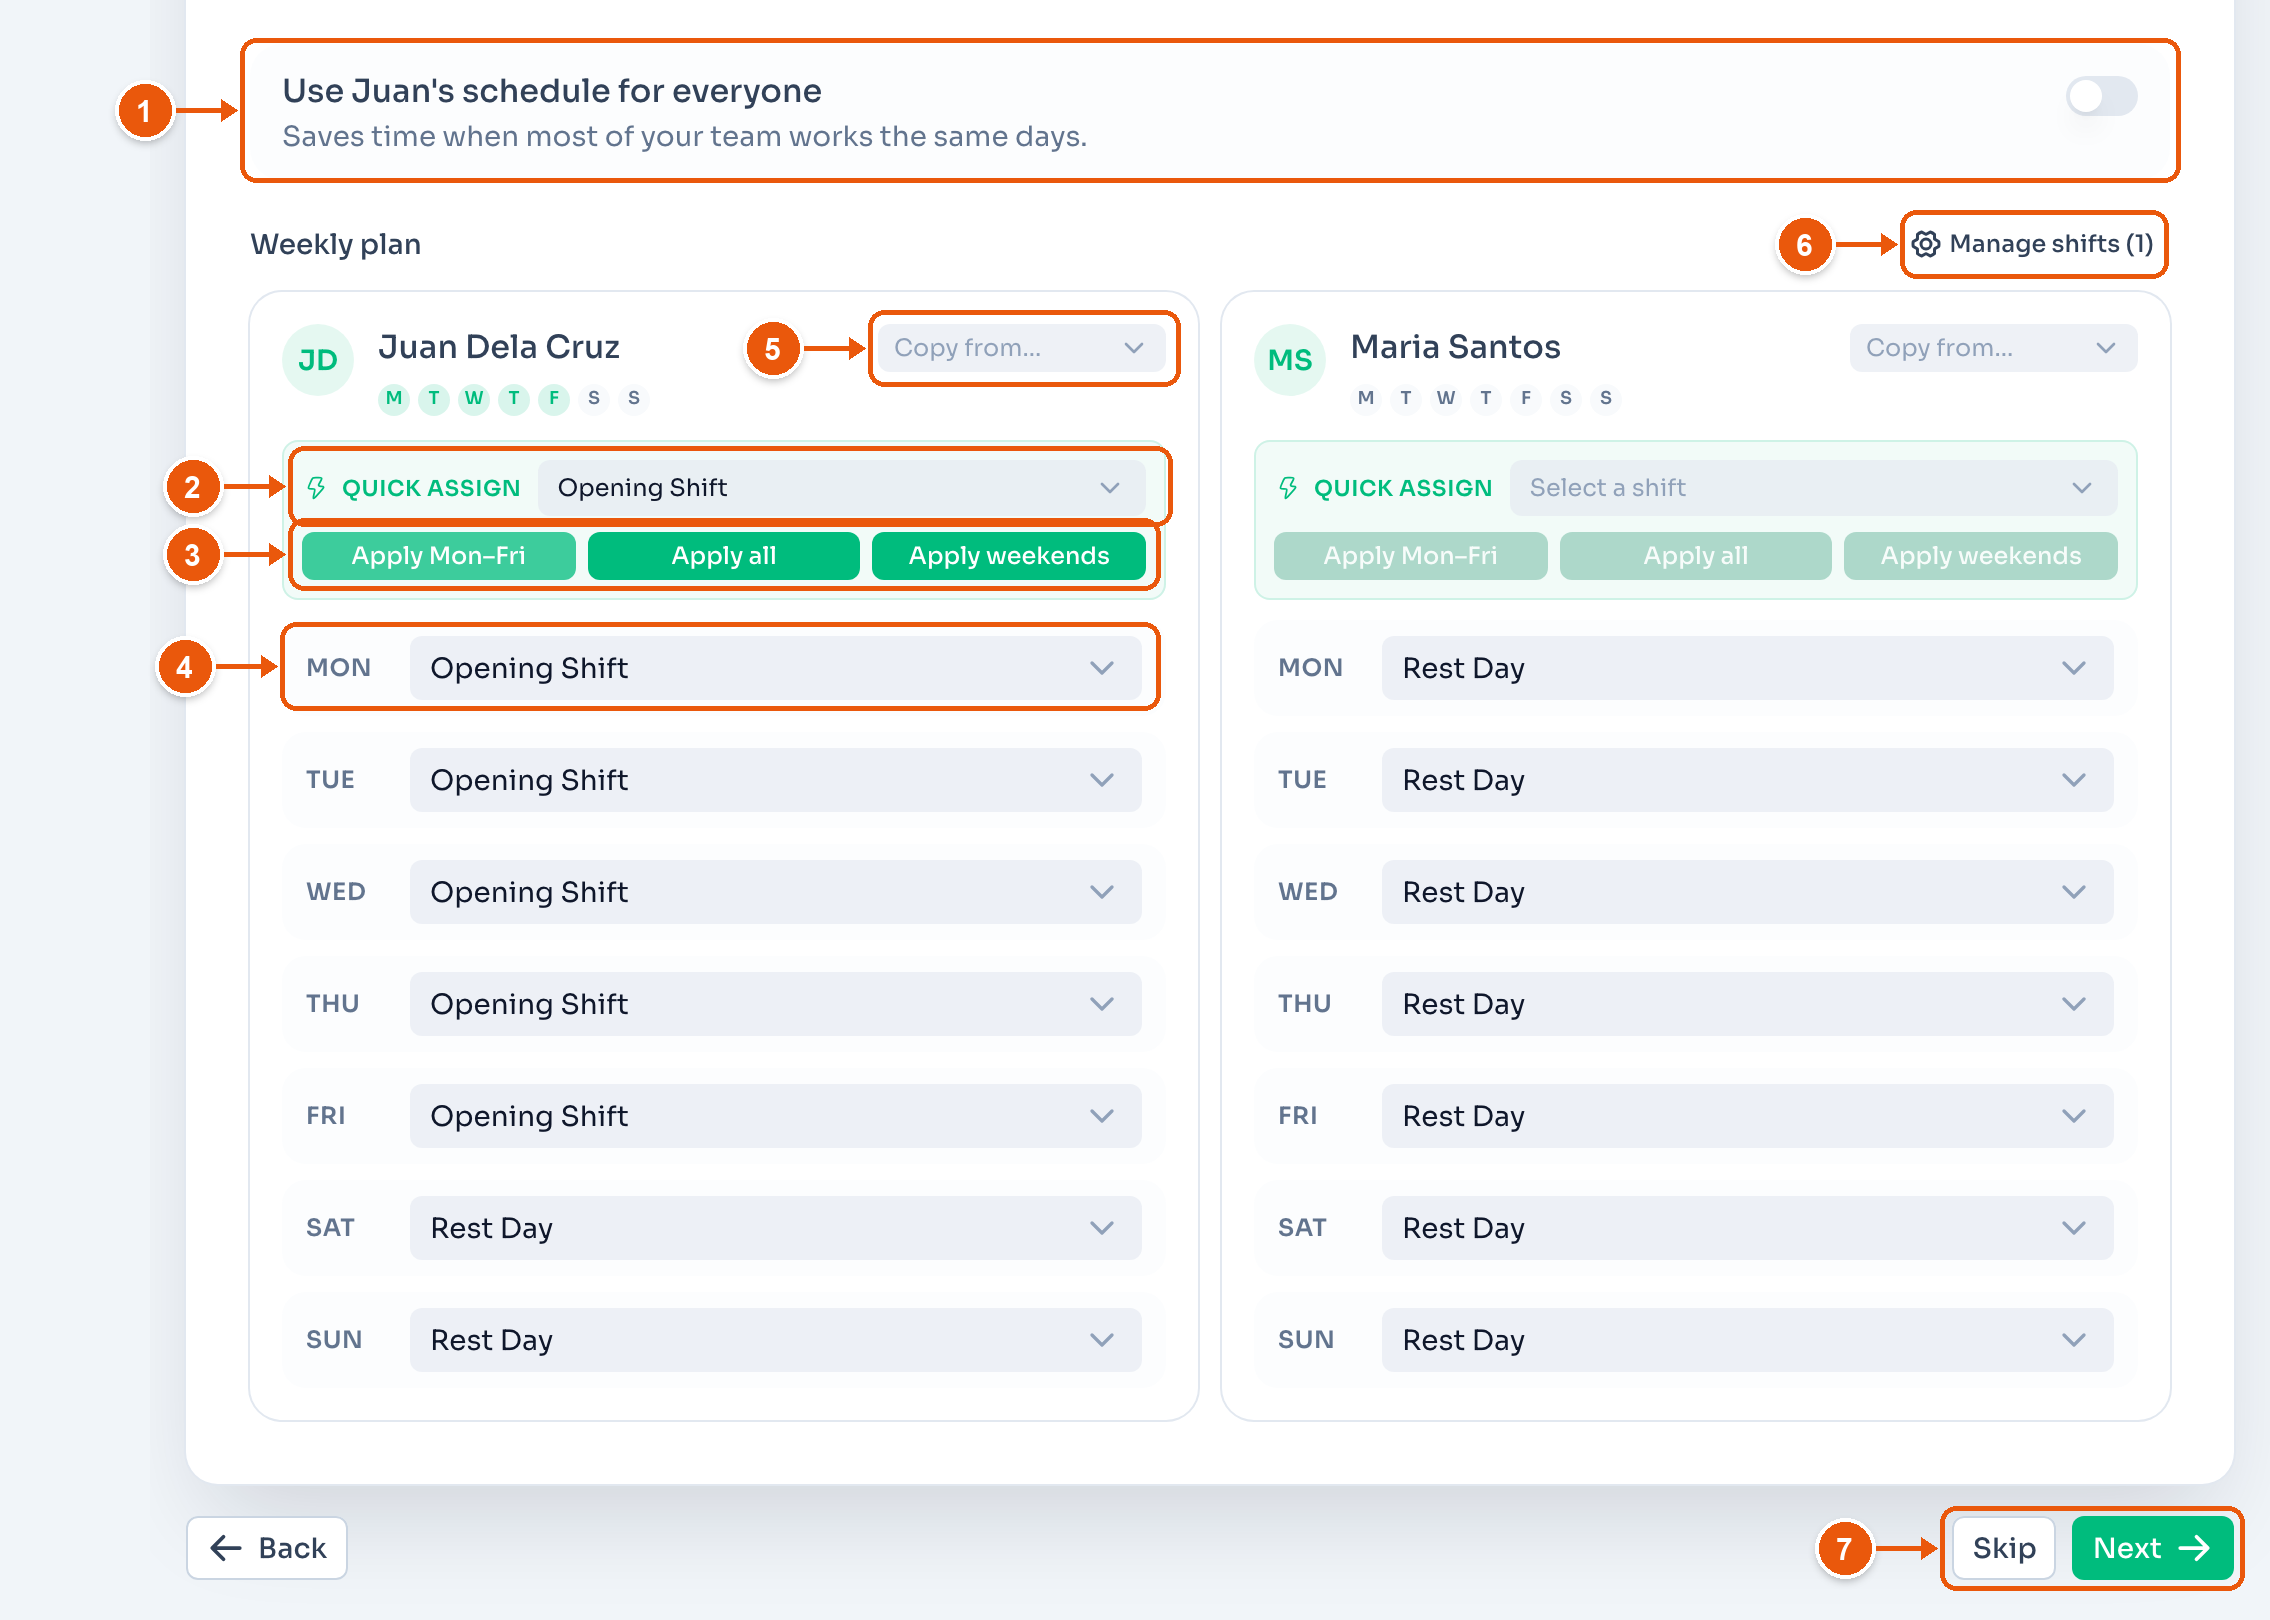
- Use Juan's schedule for everyone. The first employee's week goes to the whole team.
- Quick assign. Pick a shift. Opening Shift (07:00–16:00) and Closing Shift (10:00–19:00) are ready to use.
- Apply Mon–Fri, Apply all or Apply weekends puts that shift on those days. Here, Monday to Friday.
- One day. Pick a shift, Rest Day, Open Hour (any time), or Create a new shift… for your own start and end times.
- Copy from... copies another employee's week.
- Manage shifts renames, retimes, adds or removes shifts.
- Skip leaves schedules for later, in Shifts. Next goes to the review.
Review and finish
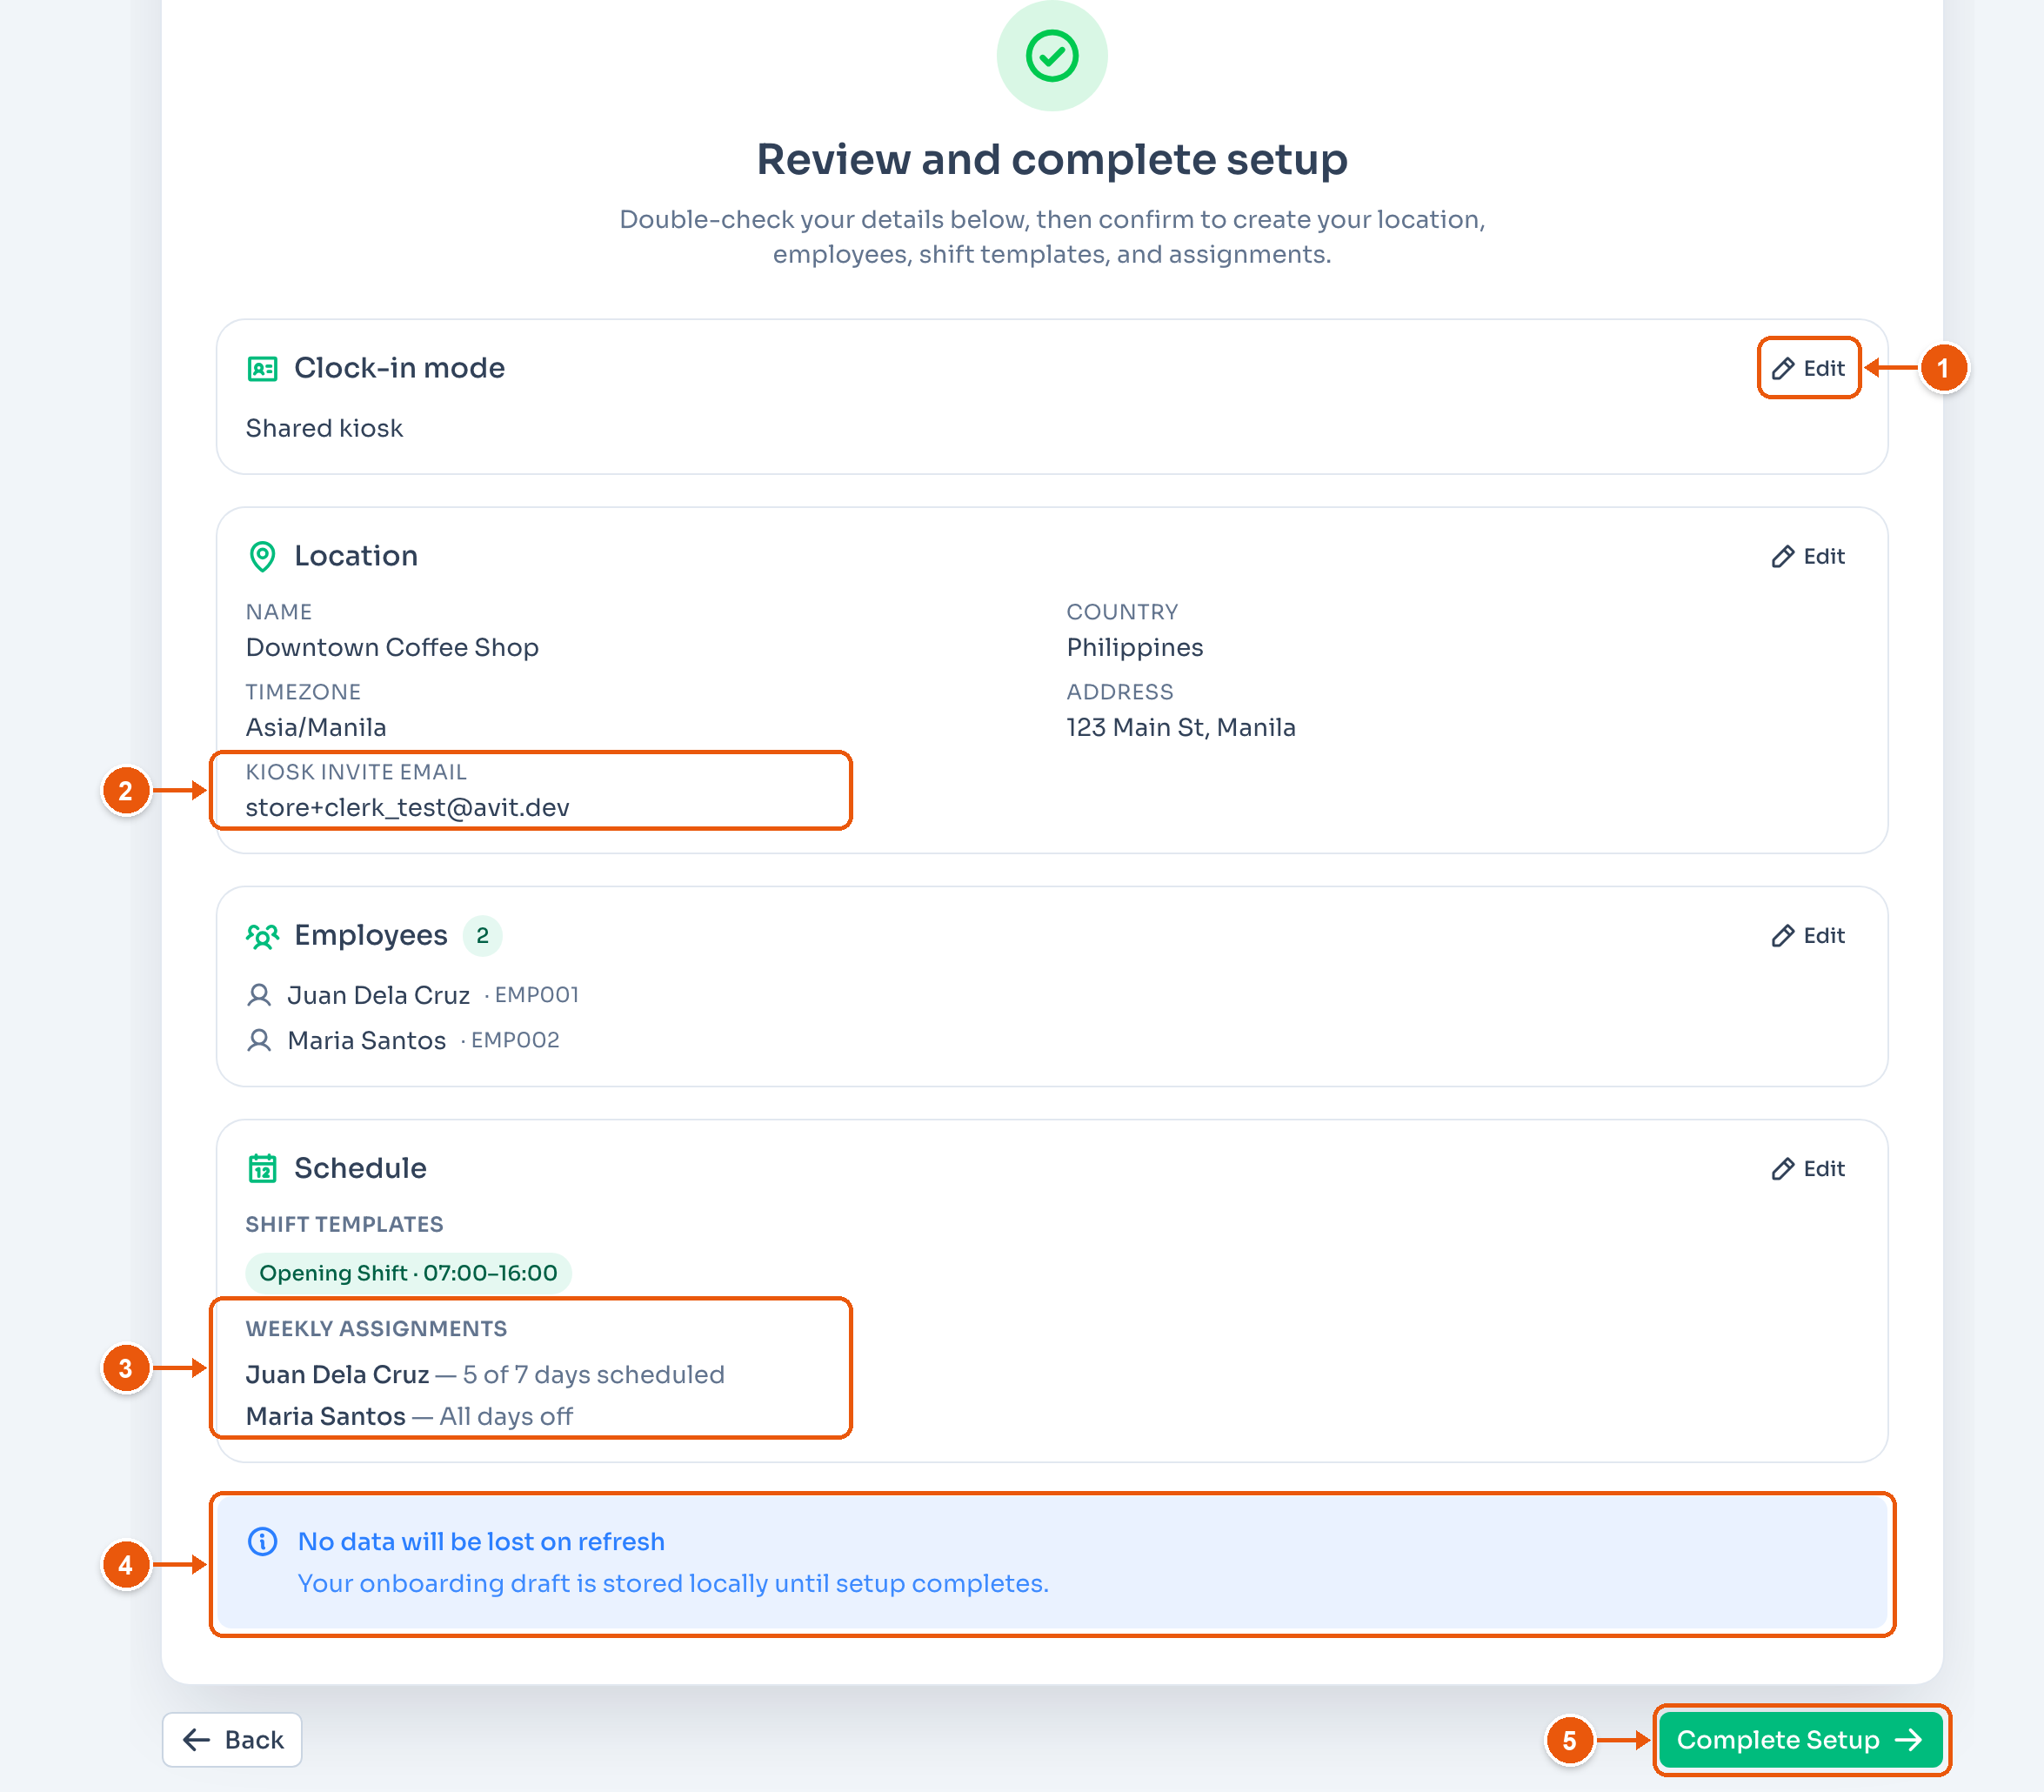
- Edit goes back to that step.
- The kiosk email that gets the invite.
- Each employee's week. Here, Juan works 5 of 7 days and Maria has all days off.
- Your draft stays in this browser until setup is done.
- Complete Setup creates the location, employees, shifts and schedules, and sends the invites.
The finished screen lists each employee's PIN with a copy button. Copy the PINs before you leave. This is the only time ClockTap shows them. Later, Reset PIN on the employee's page gives them a new one. The old PIN cannot be shown again. Go to Dashboard closes the wizard.
Get your team clocking in
Shared device. ClockTap emails an invite to the kiosk email. Open it on the kiosk device itself, not your own computer, and set a password. That device stays signed in to the location. Staff then tap their PIN to clock in and out. To resend or change the invite, open Location Settings → Shared device. See Shared Device.
Personal login. Each employee gets an invite email. They set a password, sign in on their own phone, and clock in. See Personal Login.
Supervisors get their own invite. Their access starts once they accept it.
See the first clock-ins
Clock-ins show on the Dashboard as they happen. Attendance lists every record, and Reports covers export for a cut-off.
Next steps
- Shared Device: install the kiosk on the shared device.
- Shifts: add shift templates and change schedules.
- Share a location: run a location with a business partner.
- FAQ: short answers to common setup questions.